CSS Selectors 101: Targeting Elements with Precision
Overview
In this article, we are going to learn about CSS selectors, why we need selectors, and the meaning and working of CSS. But before starting the CSS journey, if you don’t know HTML, follow the HTML article.
Why we need CSS
As we all know, HTML can provide structure to a web page. But how the webpage should look, how each HTML element should be positioned, everything can’t be managed using HTML only. So we need some kind of rules that can be defined to give html element a proper look and feel with the corresponding position of each HTML element. Here CSS comes into the picture, we can write all rules, then the browser reads those rules and apply accordingly to the elements, and we can see some beautiful UI (User Interface) / UX (User Experience).
Meaning of CSS
CSS stands for Cascading Style Sheets. Let’s try to understand the meaning of each word.
Cascading
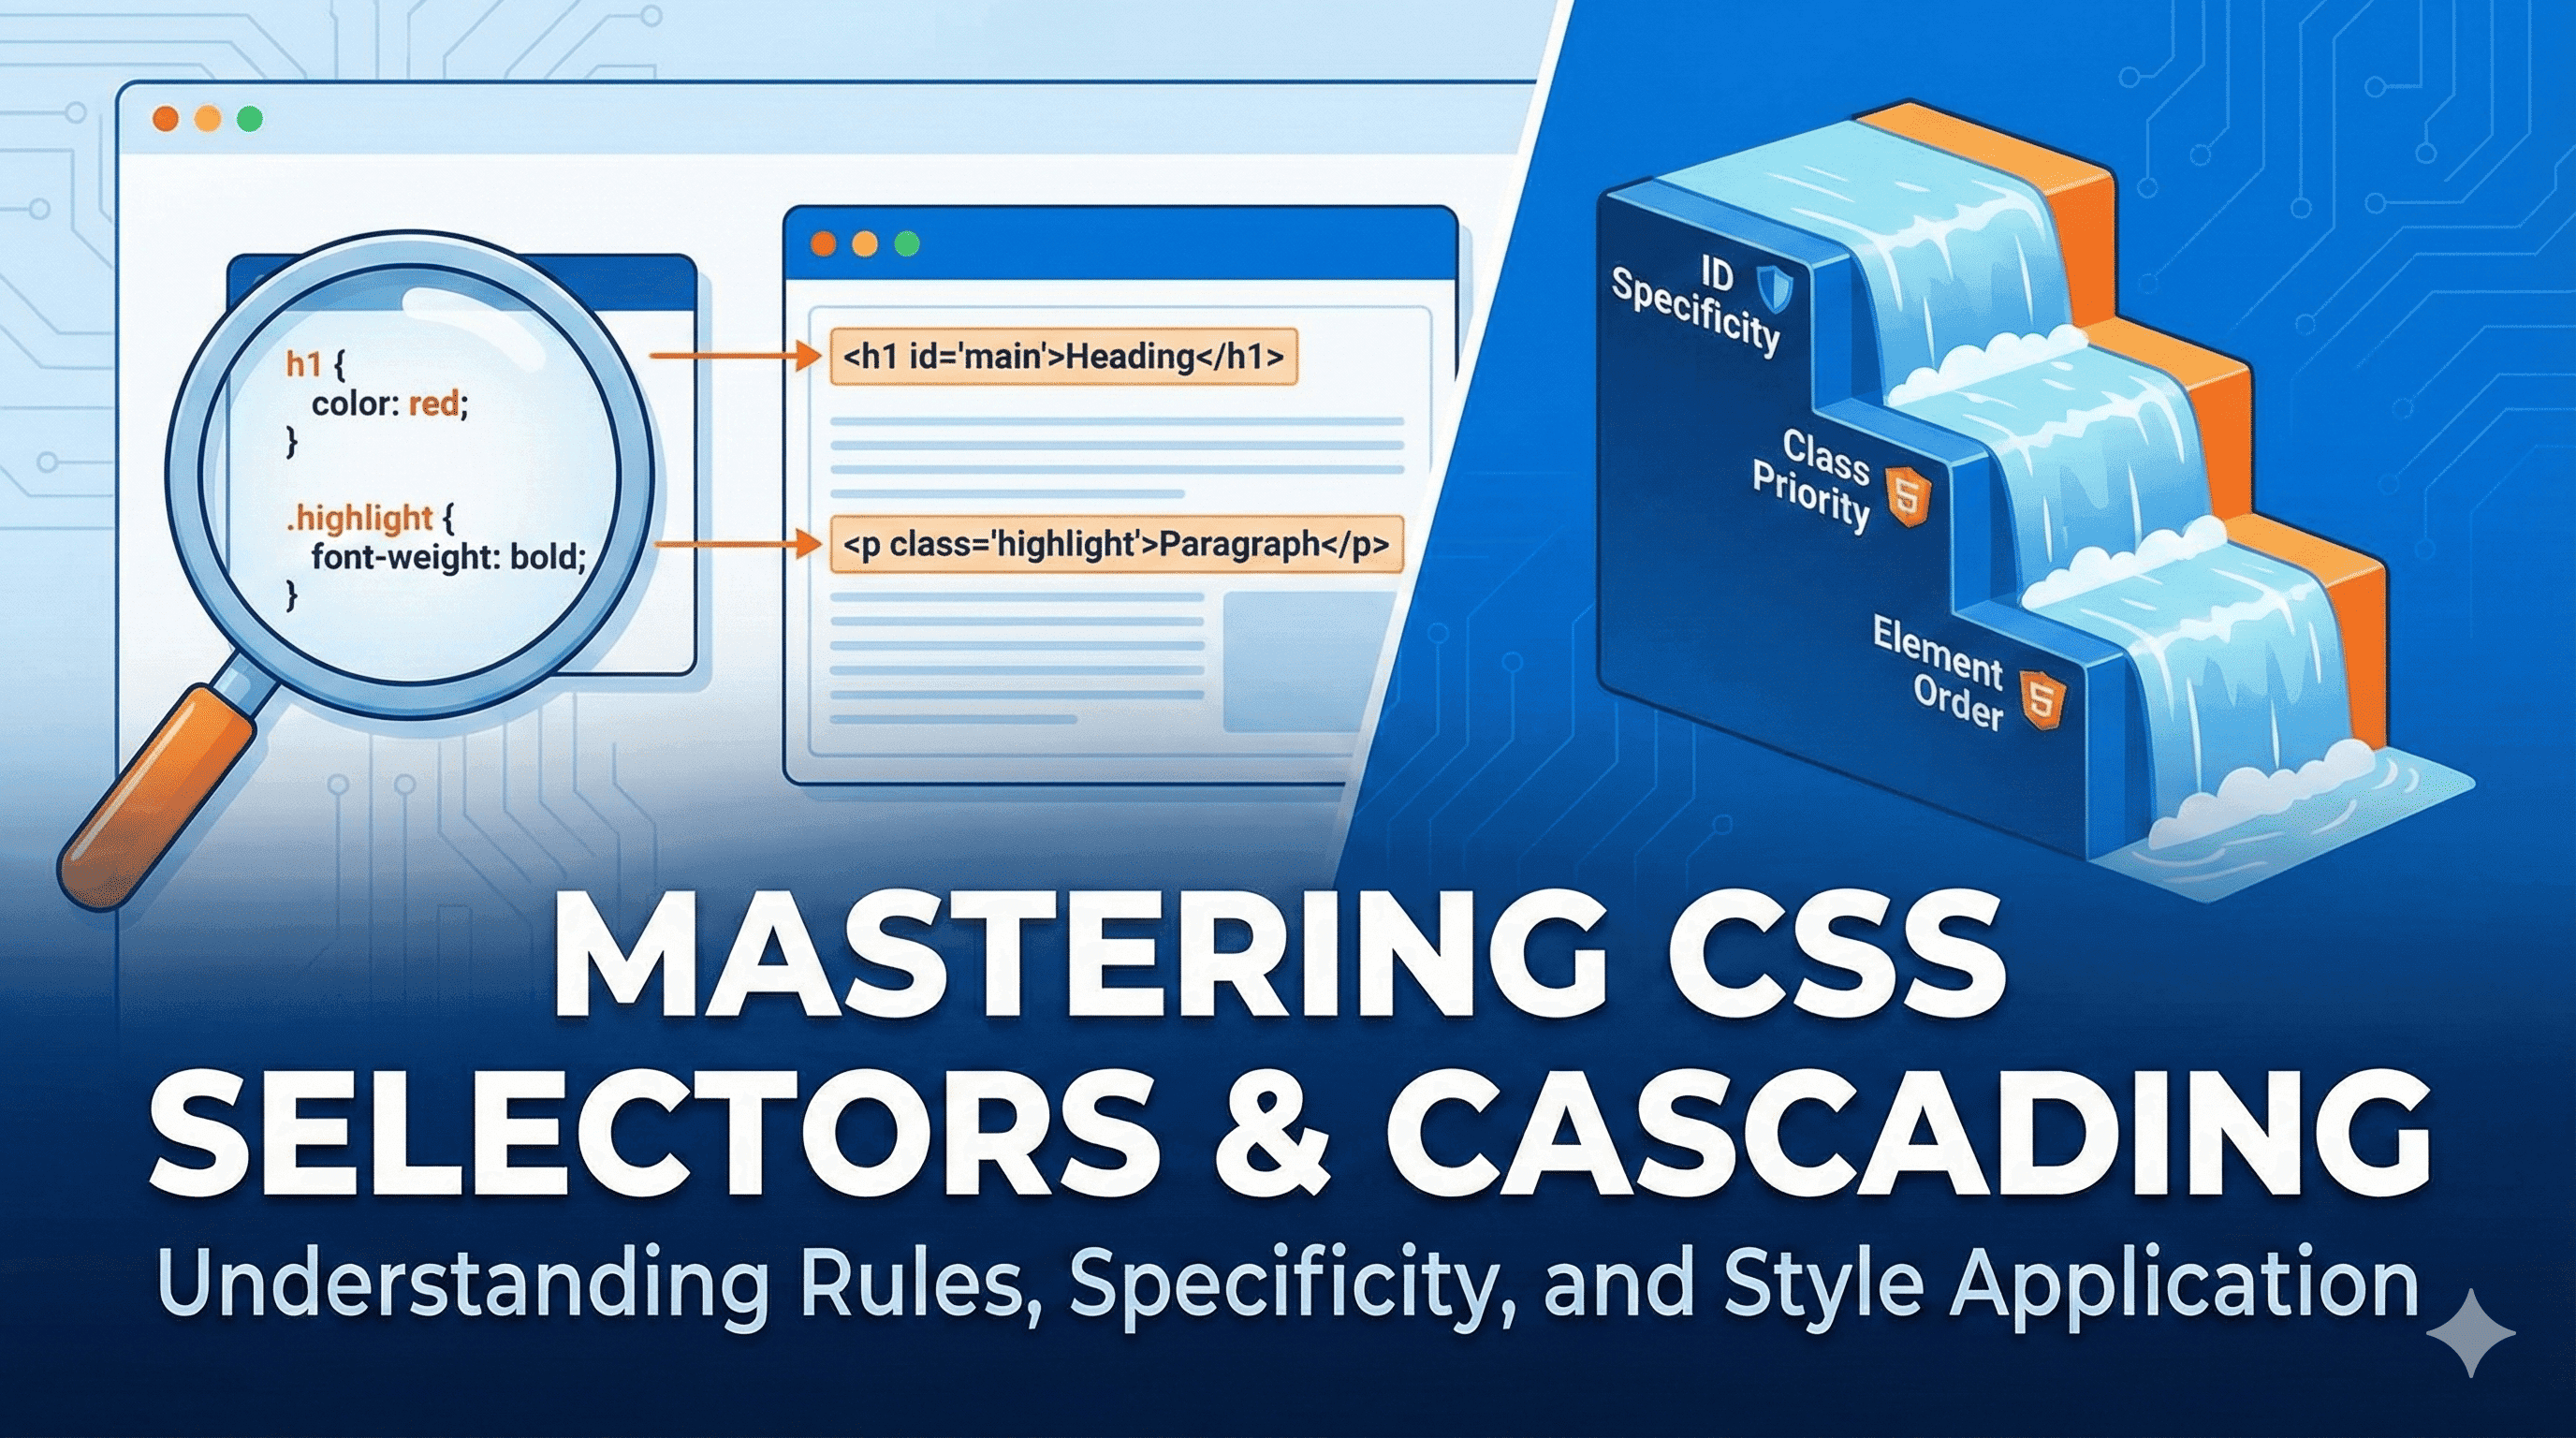
If you are going on a vacation with 3 of your friends, and you are the driver, then you rely only on the friend who actually knows the place. So here you have a priority preference. Cascading in CSS also does the same. If multiple CSS rule applied to a single element, CSS decides which one to use based on order and its specific priority. CSS calls this the specificity algorithm.
Style Sheets
It is a file that contains the CSS rules.
Syntax Example
h1 {
    color:red;
}
Different Ways to Write CSS Rules
We have mainly these three ways to write CSS
Inline CSS
Internal CSS
External CSS
Inline CSS
Here, we write CSS directly into the element within a style attribute
<h1 style="color:red;">Heading</h1>
Selector in CSS
As we all know, in HTML, we have elements, and to apply CSS rules, we have a selector to select those elements. We have multiple selectors in CSS, which are as follows
Element Selector
Class Selector
ID Selector
Group Selector
Desendent Selector
1) Element Selector
The element selector targets elements by their tag name. It applies the same style to all matching elements on the page.
Example
p {
  color: blue;
  font-size: 18px;
}
<p>Hello, this is a paragraph</p>
Output
Before CSS output

After CSS Output

2) Class Selector
The class selector targets elements that have a specific class attribute. We can reuse classes. A single element can belong to different classes, and a single class can be used in multiple elements.
Example
<p class="highlight fontRed">This is highlighted text</p>
<p>This is normal text</p>
.highlight {
  font-weight: bold;
}
.fontRed {
    color:Red;
}
Before applying CSS output

After CSS output

3) ID Selector
The ID selector targets a single unique element using its id attribute.
Note: ID is unique and can be used only once on a page. One Element only have single ID
Example
<h1 id="main-title">Welcome to My Website</h1>
#main-title {
  color: green;
  text-align: center;
}
Before CSS Output

After CSS Output

Class Vs ID

4) Group Selector
The group selector is used when we want to apply the same CSS rules to multiple selectors at once. We separate selectors using commas.
Example
h1, h2, p {
  font-family: Arial, sans-serif;
  color: #333;
}
  <h1>This is Heading 1</h1>
  <h2>This is Heading 2</h2>
  <p>This is a paragraph text</p>
Before CSS Output

After CSS Output

5) Descendant Selector
The descendant selector targets elements that are inside another element. It is useful when you want to style only elements within a specific section.
Example
<div class="card">
  <p>This paragraph is inside the card</p>
</div>

<p>This paragraph is outside</p>
.card p {
  color: purple;
}
Before CSS output

After CSS Output

How to Use
During the design of a web page, it’s always a good practice to use all of this method with a combination based on your usecase. Assume you can define the same font-family for all heading then you can use the element selector. If you have a few beautiful cards to display processing you can use classes. If you want to change the heading text color which is the main heading of the page, then you can use ID to particularly target that.
Mechanism of Cascading and Specificity Algorithm
Let’s try to understand the Cascading first.
As you can see, we have a heading Specificity Algorithm
<h1>Heading</h1>
Let’s apply some CSS here
h1 {
    text-align:right;
    color:red;
    border: 2px solid blue;

}
As you can see The heading Text color changed to red, and it shifted to the right side.

Here you can see we did some changes to already applied properties, and it successfully take effect as well, and not made are working fine. This is cascading, where priority goes to the order, which means which property at the bottom of the CSS only takes that.
  h1 {
    text-align:right;
    color:red;
    border: 2px solid blue;
  }
  h1{
    text-align:center;
    color:gray;
  }

Now time to understand the Specificity Algorithm
Let’s take a heading which has an ID and a class
<h1 id="color-pink" class="color-blue">Heading</h1>
Now apply some CSS
  #color-pink{
      color:pink;
  }
  .color-blue{
      color:blue;
  }
  h1 {
    color:red;
    border: 2px solid blue;
  }
As you can see in the final output, instead of following the properties order, it always gives ID to the height priority, the class, and then the element selector gets the priority.
The priority Order (High to Low)
Inline CSS
ID Selector
Class Selector
Element Selector

List of Most Used Basic CSS Properties
These are the fundamental properties you will use in almost every project.
Text & Fonts
color: Sets the color of the text (e.g.,red,#333).font-family: Sets the font type (e.g.,Arial,sans-serif).font-size: Sets the size of the text (e.g.,16px,1.2rem).font-weight: Sets the thickness of the text (e.g.,bold,400).text-align: Aligns text horizontally (e.g.,center,left,right).line-height: Sets the vertical space between lines of text.
The Box Model (Size & Spacing)
width/height: Sets the width and height of an element.margin: Space outside the border (pushes other elements away).padding: Space inside the border (pushes content away from the border).border: A line around the element (between margin and padding).border-radius: Rounds the corners of the border.
Backgrounds
background-color: Sets a solid background color.background-image: Sets an image as the background.
Layout & Positioning
display: Determines how an element behaves.block: Takes up the full width (like<div>,<h1>).inline: Takes up only the necessary width (like<span>).flex: Enables Flexbox layout (puts items in a row).
position: Used for advanced positioning (relative,absolute,fixed).
Example
<!DOCTYPE html>
<html lang="en">
<head>
    <meta charset="UTF-8">
    <title>Basic CSS Properties</title>
    <style>
        /* 1. Base Styles (Text and Background) */
        body {
            background-color: #f0f2f5; /* Light grey background */
            font-family: Arial, sans-serif;
            color: #333333; /* Dark grey text */
            margin: 0px; /* Reset default browser margin */
        }

        /* 2. Main Container (Layout) */
        .main-container {
            width: 600px;
            margin: 50px auto; /* auto centers the container horizontally */
            background-color: #ffffff;
            border: 1px solid #cccccc; /* Thin grey border */
            padding: 30px; /* Space inside the container */
        }

        /* 3. Header Section (Text Alignment) */
        .header {
            text-align: center;
            border-bottom: 2px solid #eeeeee;
            padding-bottom: 20px;
            margin-bottom: 20px; /* Space below the header */
        }

        .header h1 {
            color: #2c3e50;
            font-size: 28px;
            margin: 0px; /* Remove default margin */
        }

        .header span {
            color: #7f8c8d; /* Lighter text for subtitle */
            font-size: 14px;
        }

        /* 4. Flexbox Layout (Side by Side) */
        .content-box {
            display: flex; /* Makes children (divs) sit in a row */
            gap: 20px; /* Space between the two columns */
        }

        /* 5. Columns */
        .left-column {
            width: 30%;
            background-color: #3498db;
            color: white;
            padding: 15px;
            text-align: center;
            border-radius: 8px; /* Rounded corners */
        }

        .right-column {
            width: 70%;
        }

        /* 6. Typography adjustments */
        .right-column h2 {
            font-size: 20px;
            margin-top: 0px;
        }

        .right-column p {
            line-height: 1.6; /* Makes text easier to read */
            font-size: 16px;
        }

        /* 7. Button Style (Static - No Hover) */
        .btn {
            display: inline-block;
            background-color: #27ae60;
            color: white;
            padding: 10px 20px;
            text-decoration: none; /* Removes underline from link */
            border-radius: 5px;
            font-weight: bold;
            margin-top: 10px;
        }
    </style>
</head>
<body>

    <div class="main-container">

        <div class="header">
            <h1>Jane Doe</h1>
            <span>Senior Web Developer</span>
        </div>

        <div class="content-box">

            <div class="left-column">
                <strong>Status:</strong><br>
                Active
            </div>

            <div class="right-column">
                <h2>About Me</h2>
                <p>
                    I am a developer learning CSS basics.
                    I understand how margin, padding, and borders work.
                    This layout uses a simple flexbox row to put items side by side.
                </p>
                <a class="btn" href="#">Contact Me</a>
            </div>

        </div>

    </div>

</body>
</html>
Output

Conclusion
You don’t need to memorise all CSS properties; CSS is a skill which become strong eventually with practice. When you build 20 or 30 projects using CSS, you willbe able to build an understanding of each property

.