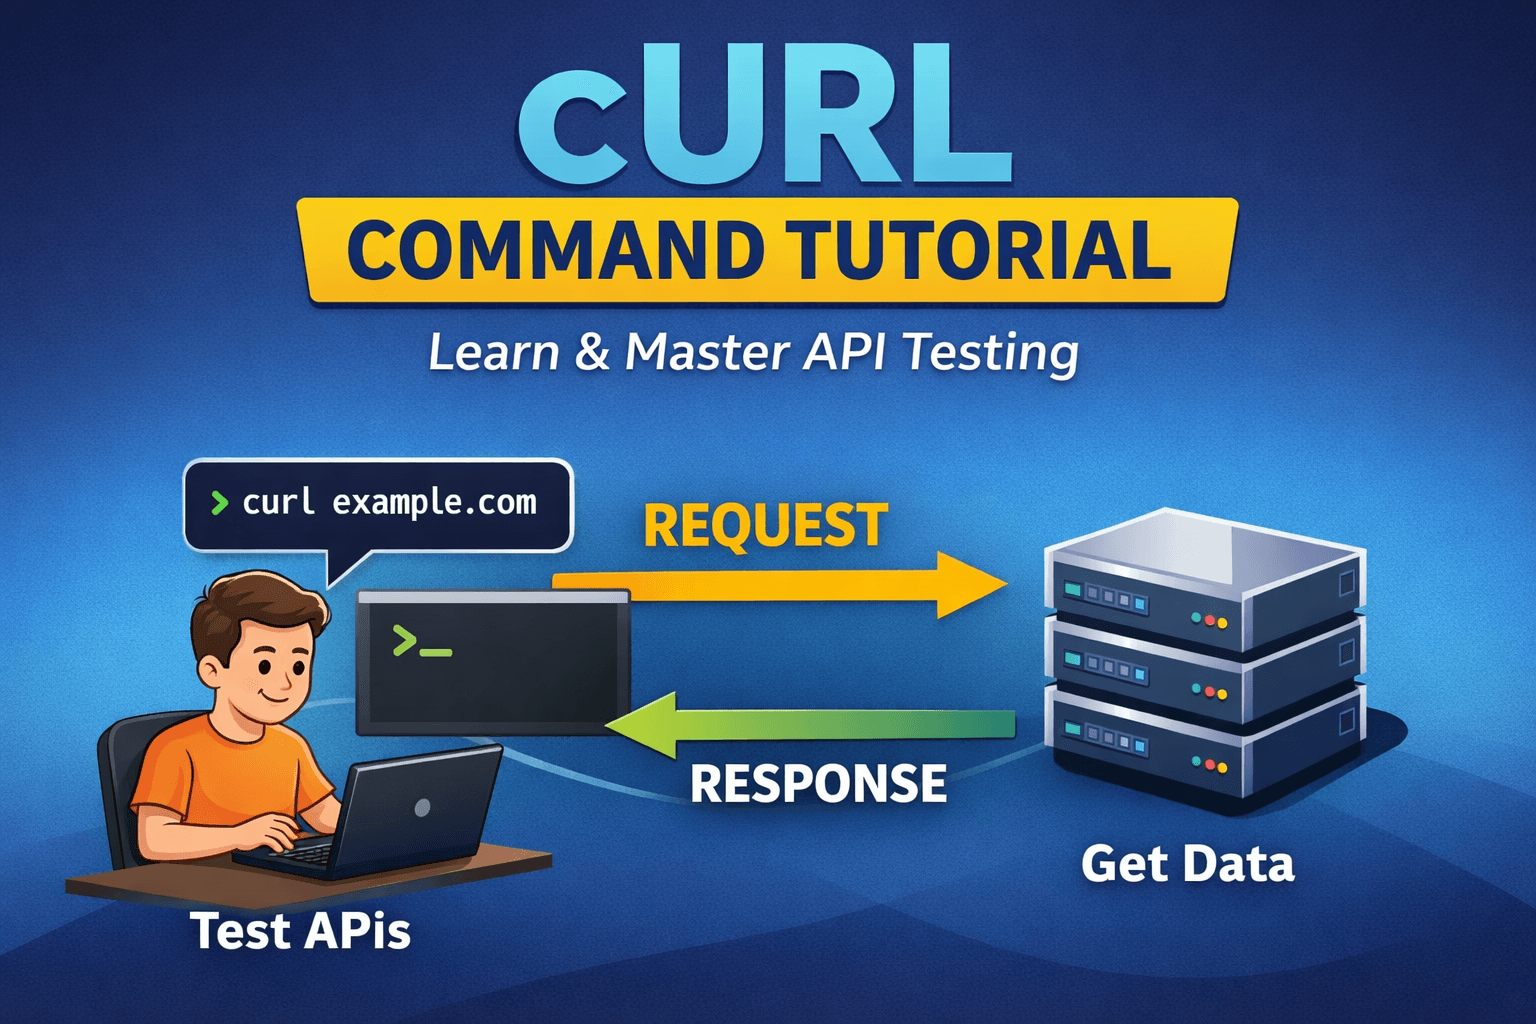
Getting Started with cURL
Overview
Before understanding the CURL, we need to understand the Client and Server; on the Internet, most command word is client mean which always want some data from the server. and Server is providing that data to the client.

What is CURL
The curl command in Linux is a command-line tool for transferring data between a system and a server using various network protocols. It is primarily used to fetch web content, test APIs, and send or receive data over the network.
Supports multiple protocols such as HTTP, HTTPS, FTP, and SCP
Used to download, upload, and send data from the terminal
Helpful for testing REST APIs and web services
Works with headers, authentication, and data formats like JSON
Why programmers need cURL
Without having a frontend, a programmer can test the Backend API.
Debug backend issues and fix them quickly during creation time.
With
curl, you hit the API directly:No browser cache
No JavaScript
No UI bugs
This is fast and simple.
Example:
curl example.com
Output

Request and Response
When you run a CURL command, mainly two thing happening in the behind the scenes
Request
In this case, you send a request from the terminal to the server. In this step, you can specify the request method, request header, and most important thing request URL.
Response
In this case server send response, and you can see it on the terminal. This includes Status Code (200, 2001, 301, 404, 500, etc.), Data

CURL command Guide
GET Request
- To make a simple GET request, just type curl <url> this make a simple GET request.
curl example.com
This command will retrieve the HTML content of the specified URL and display it in the terminal.

- If you want to save that file in our system, you can use curl options
# curl -o <file_name_as_you_want> <url>
curl -o index.html example.com # -o to save a file. It takes a file name

- If you want to see the response header, you can use
-Ioption with the curl command
curl -I example.com
As you can see here, the status we get in response is 200, which means a successful request. Also, the Data of the response and Content-Type is HTML, and the server from which the response come form is Cloudflare.

- If you want to download a file using curl, you can use the capital -O option, which downloads the file; this takes the file's original name from the server.
curl -O https://acrobat.adobe.com/us/en/why-adobe/about-adobe-pdf.html

- If you want to get a api data, you can use -X, then you can specify the request method, in our case, that is GET for now
curl -X GET https://jsonplaceholder.typicode.com/posts
Output
[
  {
    "userId": 1,
    "id": 1,
    "title": "sunt aut facere repellat provident occaecati excepturi optio reprehenderit",
    "body": "quia et suscipit\nsuscipit recusandae consequuntur expedita et cum\nreprehenderit molestiae ut ut quas totam\nnostrum rerum est autem sunt rem eveniet architecto"
  },
  {
    "userId": 1,
    "id": 2,
    "title": "qui est esse",
    "body": "est rerum tempore vitae\nsequi sint nihil reprehenderit dolor beatae ea dolores neque\nfugiat blanditiis voluptate porro vel nihil molestiae ut reiciendis\nqui aperiam non debitis possimus qui neque nisi nulla"
  },
  {
    "userId": 1,
    "id": 3,
    "title": "ea molestias quasi exercitationem repellat qui ipsa sit aut",
    "body": "et iusto sed quo iure\nvoluptatem occaecati omnis eligendi aut ad\nvoluptatem doloribus vel accusantium quis pariatur\nmolestiae porro eius odio et labore et velit aut"
  },
  {
    "userId": 1,
    "id": 4,
    "title": "eum et est occaecati",
    "body": "ullam et saepe reiciendis voluptatem adipisci\nsit amet autem assumenda provident rerum culpa\nquis hic commodi nesciunt rem tenetur doloremque ipsam iure\nquis sunt voluptatem rerum illo velit"
  }...]
Post Request
- We can also make a post request using -X with the POST method
curl -X POST -d "title=foo&body=bar&userId=1" https://jsonplaceholder.typicode.com/posts

Let’s try to talk with the API
curl -X PATCH -d '{"title":"foo"}' https://jsonplaceholder.typicode.com/posts/1


Using curl, a developer can Test, Debug api endpoint very fast, which improves the speed and rapid development.
Things that a beginner make mistake about curl
CURL just goes through the RAW html and api response; it does not run JavaScript and CSS.
Also beginner don’t use the protocol without currect protocol; curl sometime misbehave.
More Option on curl
Examples of Curl with Options Reference (Source)
Given below are some examples demonstrating the use of the curl command in Linux along with their options.
| Option | What It Does |
[URL] | (No option) Prints URL content to stdout. |
-o filename | Saves output to a one, custom filename. |
-O | Saves output using the Original filename from the URL. |
-C - | Continues/Resumes an interrupted download. |
-X METHOD | Specifies the HTTP method (e.g., -X POST, -X DELETE). |
-d "data" | Sends data in a POST or PUT request. |
-H "Header" | Adds a custom HTTP Header (e.g., for JSON or auth tokens). |
-L | Follows any server redirects (e.g., 301, 302). |
-u user:pass | Provides user authentication credentials. |
-T file.txt | Transfers (uploads) a local file to a destination. |
-I | Fetches headers only (HTTP HEAD request). |
-i | Includes the HTTP response headers in the output. |
-s | Silent mode (hides progress meter). |
-# | Shows a simple progress bar. |
-C - Option:
This option resumes the download that has been stopped due to some reason. This is useful when downloading large files and was interrupted.
Example:
curl -C - -O ftp://speedtest.tele2.net/1MB.zip
Output:

-u Option:
curl also provides options to download files from user-authenticated FTP servers.
Syntax:
curl -u {username}:{password} [FTP_URL]
Example:
curl -u demo:password -O ftp://test.rebex.net/readme.txt
Output:

Conclusion
cURL is a simple yet powerful tool that helps you understand how clients and servers communicate by letting you test APIs and servers directly from the terminal. You don’t need to remember every option—just practice the basics, and the rest will naturally make sense as you build and debug real projects.